


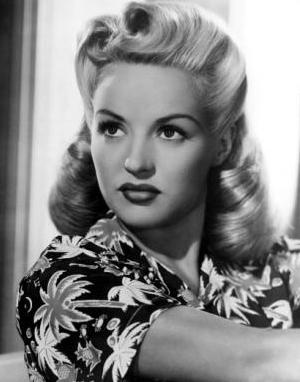
Victory Rolls - Classic 1940s Hairstyle
If you want to achieve a retro look from the 1940s, then victory rolls are the perfect hairstyle for you!
You will need some things to complete your classic pin up rolls:
- Curling iron
- Round brush
- Heavy duty hairspray
- Mousse (optional - for extra hold for unmanageable hair)
- Bobby pins
Step 1 - Curl It!
 Now, for the first step. Get your curling iron and curl your hair in sections.
Ensure you spray your hair prior to curling with heat protecting spray.
It's very important that us pin up dolls look after their hair as much as we can, because without our perfect dos, we wouldn't be pin ups :)
Step 2 - Mousse it !
 Next, your light mousse should be ready because you will need this in this step.
In a motion from the bottom up, create a more malleable effect.
Try to avoid putting too much mousse on the ends as this will weight your hair down far too much.
Step 3 - Part It!
 Part your hair with a rat comb or a pencil. Anything with a pointy end.
You can chose to part your hair to the side or in the middle.
If you have Bettie bangs, parting in the middle is probably the best option.
If you don't, I would recommend parting your hair off center. I find it looks cuter this way.
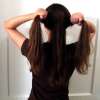
Step 4 - Pony Tail time...
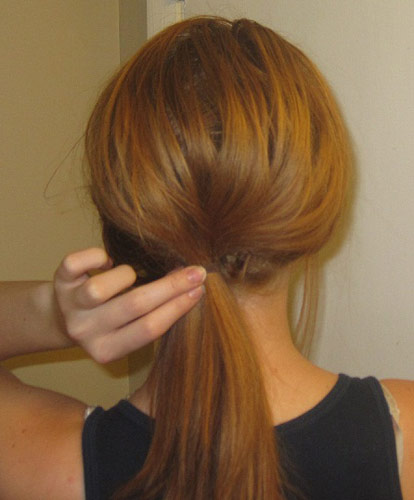 Leave out the front section of your hair, but the hair that is at the back, best to put it into a pony tail to get it out of the way.
You're about to start the process of teasing the hair which will become part of the victory rolls at the front, so it's best you control the back of your hair to limit distractions.
Step 5 - Tease It!
 Grab a section of the hair on one side of your head (quite a wide strand of hair, but not too thick and tease your hair on the underside of what will be the victory roll.
This is known to be damaging for some hair types but deep conditioning can help reverse the damage it caused.
This is a technique that is used to volumize one's hair through an “in and out” or "back and forth" motion with a comb while you are holding your hair tightly.
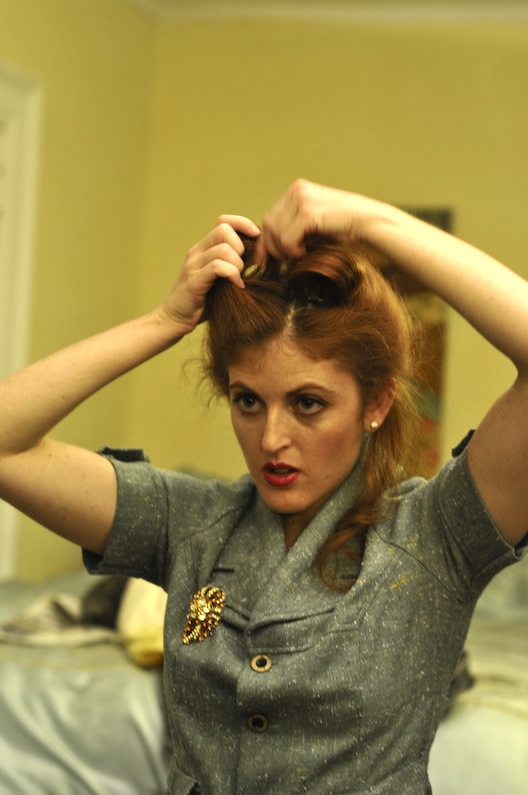
Step 6 - Roll It!
 V is for what?
It's for Victory!
Grab the section of the hair you just teased, smooth out the outer side of it with a round brush and then starting from the ends, wrap the section of your hair around 2 or 3 fingers (depending on how big you would like the rolls).
Keep rolling the hair up until it reaches the desired spot you would like it on your head.
You can have the roll vertical or slightly on an angle. It's down to personal preference.
The most common victory rolls however usually slope downwards (aka, the front part of the roll is the highest point of the completed victory roll).
Step 7 - Final Touches...
 Get those bobby pins and hairspray to hold your look.
Use as many bobby pins as you need, however make sure they aren't showing.
Kat Creasey is a famous Australian Pin Up who is a big believer in all natural products and she's not a fan of hair spray.
So that is optional, however it makes your hair a whole lot easier to manage (especially if you have hair of different lengths).
Finally, repeat the process of the victory roll on the other side and finish this look with your pins and hairspray.
Step 8 - Additional Touches...
 You can either chose to leave the hair that is currently in the pony tail as is and just curl the ends with a round brush or curling iron to clean up the hair style.
Or you can take the hair out or add some curls. This is a fun look too.
Now work it baby!
Add those red lips and cat eye make up and you are one sexy pin up bombshell!
Enjoy!
What's Hot


© 2015 Pin Up Passion. All Rights Reserved. Privacy Policy.
Have Your Say!
Have your say about what you just read! Leave me a comment in the box below.