


Half Moon Nails
By Idda van Munster
Half moon nails - step by step.
How I grow my nails naturally so long, without having them break? Despite what some think, my nails are 100% natural and I've never had artificial nails like gels or acrylics. Healthy long and strong natural nails are the only way to beautiful looking hands and a gorgeous manicure. Chapped nails, discoloured nails or weak, flexible nails have an unpleasant effect over the way they look. They look unaesthetic and need proper care ion order to revert to their natural healthy state. Take care of your nails because they too need maintenance and care like every other part of your body!
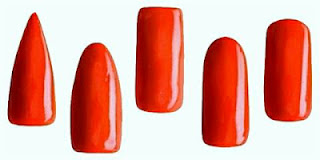
Nails naturally come in a variety of shapes and sizes, and each person has nail features that are unique. There are long fingers with wide nail beds, short fingers with short nail beds, and every combination in between.
When I first began painting my nails I always shaped them oval. The oval shape is an attractive nail shape for most women’s hands. It can accentuate femininity and gracefulness. To achieve the oval shape, first begin by straightening your sidewalls and making sure they are even. Then begin filing from the side of the nail toward the top, using smooth, arching motions with the file. From there, work your angles on both sides and around the free edge to smooth into the oval shape you’re looking for. The finished oval should have a nice balance between the cuticle shape and the free edge.

The half-moon manicure has been making a comeback, and with good reason! This gorgeous design is super easy to do and is a really fun way to add some excitement to your nails.
As the name reveals a half moon manicure presupposes a totally painted nail with a tiny half-moon left bare or coloured lightly at the base of every fingernail. To create the vintage glam look you'll need:
- a dark coloured nail polish
- a lighter coloured nail polish (for the half-moon if you want it painted)
- stickers
It is sooo easy to do:
STEP 1. I'm using BAYLIS & HARDING skin spa - hand, nail & cuticle cream with olive, sage & cocoa butter.

First of all do the routine nail care ritual, first apply the base coat which will prevent your nails from suffering any damage.
STEP 2. Start with a dry base colour
Apply a clear base coat to protect your nails from staining. Paint two coats with the lighter polish and let them dry for half an hour, creating the perfect base. Use milk white colour (for base): soft and can give the feeling of purify, looks more pure and easy.
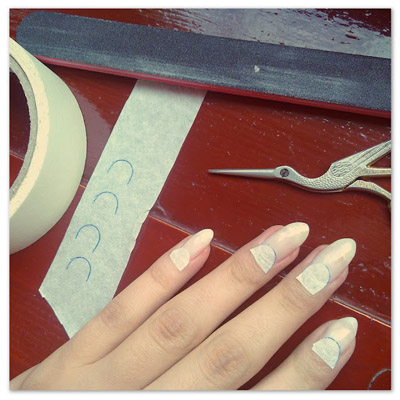
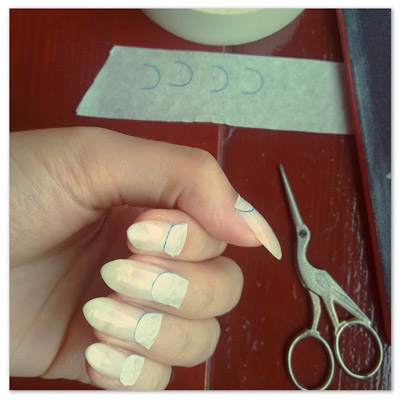
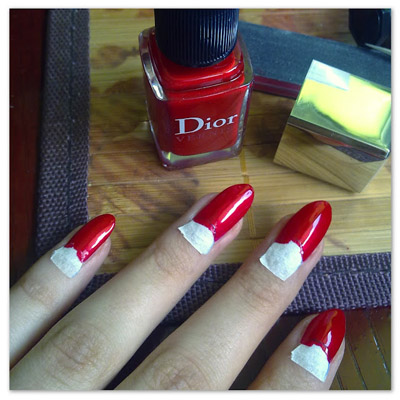
STEP 3. Apply a french manicure sticker or page reinforcer sticker
After letting your nails dry, cut the reinforcement stickers in half and place them (cut side up) just under your cuticle. Make sure they are straight and try to press down, without ruining the base, so there is no room for the other polish to seep through.
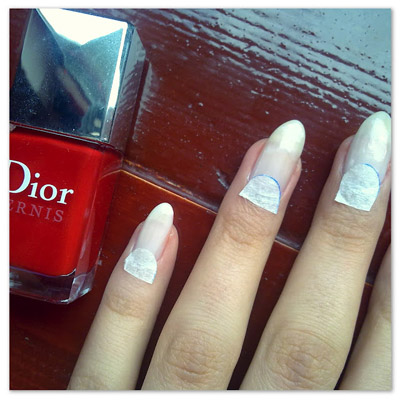
STEP 4. Quickly paint over the sticker with your second colour
Apply the darker polish onto the lower half of your nail, and go right up to the sticker, making sure to not get dark nail polish near your cuticle. I love the red Dior shade 999 Red Royalty.

STEP 5. Remove the sticker while the polish is still wet.
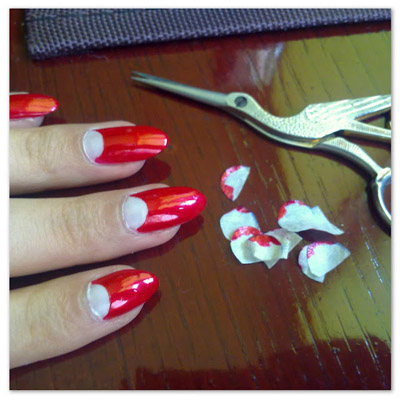
STEP 6. Half Moon Nails Finished: Be glamorous!
Whether you get this done professionally in a salon or not, it's important to let your nails grow out a bit before you try this (especially if you have small nails). You will probably want your nails to be in a long oval shape that mimics the round, half-moon shape while leaving enough room for another paint colour (or two). They could be a bit straighter across if you're not a fan of almond shaped nails, but try to keep them as rounded as possible.
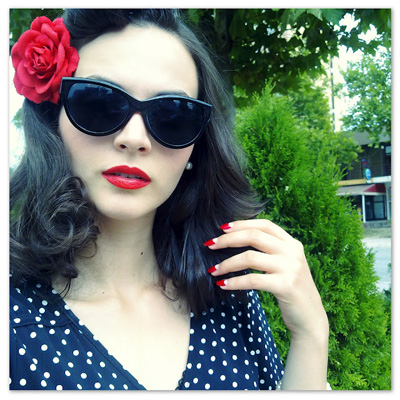
Cherry-red-colored lips and half-moon nails - looks PERFECT!

Still have some questions? Send me an email on aidadjapo@hotmail.com and I'll talk you through any problems you're having. Don't forget to email me a photo of your half moon nails!
With love,
Idda van Munster
If you enjoyed the article 'Half Moon Nails' from Idda van Munster, make sure you connect with her on Facebook:
Click here
Or follow her on her blog:
http://www.iddavanmunster.blogspot.com.au/
What's Hot


© 2015 Pin Up Passion. All Rights Reserved. Privacy Policy.
Have Your Say!
Have your say about what you just read! Leave me a comment in the box below.